
To resolve any issues with your extractor hood, resetting the appliance could be a potential solution. The process is uncomplicated and entails turning off the power source and then turning it back on again. Nevertheless, if resetting the hood doesn’t rectify the problem, a more intricate concern necessitates the expertise of a trained professional. Our article outlines the steps in resetting your extractor hood and answers some commonly asked questions regarding this topic. Without further ado, let’s begin!
What Is The Process for Resetting an Extractor Hood?
Extractor hoods are a critical part of any kitchen, helping to remove cooking smells, smoke, and steam. However, like any other appliance, extractor hoods can encounter issues requiring resetting. Resetting your extractor hood can be relatively simple if you know what to do. Here is a step-by-step guide on how to reset your extractor hood.
Step 1: Turn Off the Power Supply
While resetting the extractor hood, it is essential to disconnect its power source to safeguard yourself from electrical hazards. You can achieve this by turning off the main switch or unplugging the extractor hood from the electrical outlet. This precautionary measure is critical to ensure the protection of the AI content detector.
Step 2: Remove the Filters
After shutting down the power supply, the next step is to extract the filters from the hood. You can accomplish this by either sliding them out or turning them counterclockwise. It’s a crucial step because it grants you access to the internal components of the extractor hood.
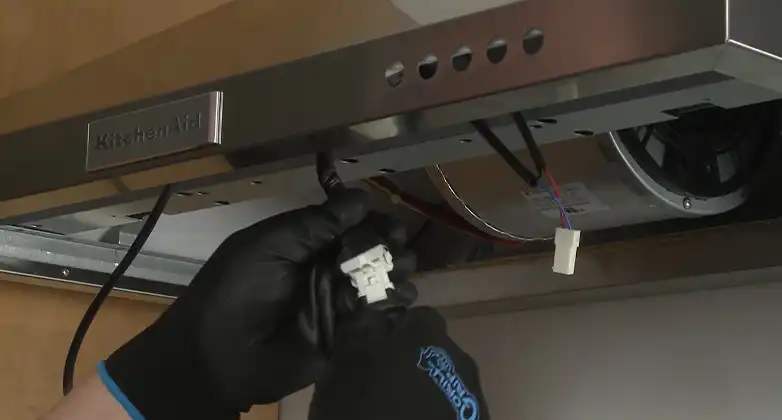
Step 3: Locate the Reset Button
After removing the filters, the next step is to find the reset button. The reset button’s position may differ based on the type and brand of the extractor hood. However, it’s typically situated on the control panel or within the extractor hood.
Step 4: Press the Reset Button
Press and hold the reset button for a few seconds. This should reset the extractor hood to its default settings. If the extractor hood has a digital display, it should show the default settings once the reset button is pressed.
Step 5: Replace the Filters
Once you’ve reset the extractor hood, the subsequent step is to reinsert the filters. Ensure that the filters are firmly positioned in their place to guarantee the smooth functioning of the extractor hood.
Step 6: Turn on the Power Supply
After replacing the filters, turn on the power supply to the extractor hood. This step is crucial to test whether the extractor hood is working efficiently or not. If the extractor hood is not functioning correctly, you may have to repeat the resetting process.
Frequently Asked Questions And Answers
Why Has My Extractor Hood Stopped Working?
Typically, a faulty motor is the cause of the problem, possibly due to shorted electrical windings within the exhaust motor or worn-out motor shaft bearings. Unfortunately, the hood motor cannot be repaired in most cases and will need to be replaced.
Do I Need to Call a Professional to Reset My Extractor Hood?
In most cases, resetting an extractor hood is a simple process that the homeowner can do. However, if you are unsure how to do it or suspect an underlying issue is causing it, it is always best to call a professional.
What If Resetting My Extractor Hood Doesn’t Work?
If the resetting process of your extractor hood does not fix the issue, it could indicate a more significant problem. In this situation, it is recommended that you seek the assistance of a professional to inspect and repair the hood.
Conclusion
In conclusion, resetting an extractor hood is a simple process that can be done by following the steps above. If you encounter any issues while resetting the extractor hood, consult the user manual or contact a professional technician for assistance. Always turn off the power supply before resetting the extractor hood to avoid electrical shocks.
![Read more about the article Should Backsplash Go Behind Range Hood? [Beneficial Tips]](https://kitchenhoodcare.com/wp-content/uploads/2023/09/Should-Backsplash-Go-Behind-a-Range-Hood-300x161.webp)
![Read more about the article [Answered] What Is a Convertible Vent Hood?](https://kitchenhoodcare.com/wp-content/uploads/2023/09/What-Is-a-Convertible-Vent-Hood-300x161.webp)